If you are not a professional MotoGP racer, you probably won’t get much attention of a helmet factory. While these boys getting spoiled beyond the actual design- they also have customized shells and liner/pads to give the perfect fit- while you have to deal with standardized sizing.

The good news- at least the prime helmet manufacturers have a highly strategically selection of standard sizes for their lids which covers the demand very well. In case if not, then a big verity of lining and cheek pads can make the difference. Again… I know that at least the Helmet Top-Guns like Arai and Shorei has this on their portfolio.

So, based on these facts you should not have problem to find a decent size for your noodle, if it’s not extremely out of shape. The problems are mostly the riders themselves when purchasing a new lid- or, sometimes untrained motorcycle gear staffs who often seem to pick a size for their customers to reduce stock.

No, I’m not pulling this out of the blue… I’m seeing almost every day that especially brand new riders (which are mostly depending on size suggestions of that kind) who are coming to Superbike-Coach classes or 1on1- that their helmets dangling around on their heads or even bouncing down to their noses. Don’t laugh, that is really happening.

Let’s have a look at how important it is to pick the right helmet size in general, so here is my logic:

  • a too big helmet is louder
  • bounces into sight
  • can cause more injury as necessary
  • can even fly off your head as you crash
  • shaking can cause distraction
  • might feels OK in the store, but not comfy on the ride

How do I know?!… I’ve been there. I am a burned child, because my helmet flew off my head at my first ever crash. Of course it was all closed, but the quality back then compared to today- oh gee… my Arai Corsair is like a Ferrari around my head today. I’ve picked that helmet back then myself too, and I didn’t spend much of a attention to it as well. So here are two things I’ve learned, how a helmet has to be in the first place:

  1. Damn expensive
  2. Snug as hell

Let me explain point one. The price of a helmet displays its quality and that includes the test procedures a product like this underlays, materials, safety features, functionality, aerodynamics and tests, design, testing staff (racers often included). All of this becomes handy for you when crashing. At that point I should remind that you have only that one head which hosts your most valuable organ, and that should be prioritized over some fancy rear sets.

Point two is easy to put. I have my lids sitting so snug that I barley get in and out. I witnessed it ones, that a girl at a retailer chose a helmet she got easier in/out with. Horrible! It got to sit so snug that there is no way that you could move it around on your head- or to wiggle your head and to slide the sit of the helmet. I think of ‘as snug as possible’. It might doesn’t feel right in the store, but you’ll appreciate it as soon the wind starts playing with it.

So how to start this out?!

Have a friend measuring your head to evaluate the base size of your lid (Arai chart above). That will be also THE MAXIMAL BIGGEST SIZE YOU’LL PICK. Try now the next smaller one and see how much pain you can take :-)

With each size you try this: Shake, wiggle, try pulling it off (closed strap), if your ears are not squeezed, if your nose doesn’t touch the chin guard. The moment where your skin and scalp sticks with the lining… you’re good. Any additional movement shouldn’t be tolerated. If you hang between sizes- invest in different pads to make the helmet yours. You’ll get use to it as long your nose and ears have some clearance in there. I personally use size M for my Arai Corsairs and add a pad on top of my head because I like it sits slight higher, but let me explain that and more in my little video below:

Arai Corsair-X Helmets

Headcoach Can Akkaya Video Blog
With every class, events and seminars I learn something new about the needs of the people I coach and talk to. To gather intelligence is one of the building blocks of how I design my programs.

One perception goes deep. Actually way deeper as it might feels/looks at first glance, and this is that most riders are actually don’t even know what they are looking for in a motorcycle riding class. When I ask plain, the general answer is ‘I want to be more confident.‘, or ‘I don’t know. I believe I need to fix my body positioning‘. I have my ways to get more specifics from them they begin to warm up and telling me their stories.

It seems that most are looking for solutions based on the situations they’ve experienced, like ‘I am hitting debris in a blind turn. How to deal with this?’- or ‘How to get around a deer’- or ‘…a merging car…’ etc. Some actually getting a little mad when I reject the question. Why?!… well, because my imagination of what exactly their situation was is pretty limited, isn’t it?! I mean… how can you expect to hear from me a 100% solution if I don’t know ALL OF THESE FACTORS:

  • how fast were you?
  • what was your EXACT lean?
  • what was the EXACT distance to the object?
  • what’s your reaction time like?
  • how do you react under panic?
  • what was your EXACT line?
  • was there a bump?
  • how was the grip niveau of the asphalt?
  • was the space to the left/right?
  • at what EXACT point and angle in the turn?
  • how was the light?
  • how is your bike setup?
  • how old are your tires, and what are they capable of?
  • did you have sleep enough last night?
  • did you have a beer or too last night?

are linked with each other and make a plain answer impossible. Sure, I could give a standardized truism answer like ‘counter steer’, but in the end it is just an empty phrase, because without knowing all of the factors above… how should I know where and when to put an eventual live saving counter steer?!

But no, some really get mad and might think that I wouldn’t know or that I’m just sales pitching Cornering classes, when I keep the explanation in a seminar short when questions coming my way in regard counter steering. Of course I KNOW, but if I would try to explain it without doing live demos, drills, and plenty of riding time and to correct you to finally get it down… then it actually is it just like the same as if you would read it in a damn book, where efficiency is questionable (!). Any answer would be just a waste of time and the rider filled only with half-knowledge.

So what is the ‘perfect street rider class’? How about I deliver the scenario to send you through a bunch of blind turns- covered with debris, and let you go back and forth? Or I send you down a long straight into glaring sunlight and let deer’s jump in your way? Those deers would be exchangeable with red, white and silver Priuses so that would be covered as well. How about a class like that?! Sorry no, because the ‘SURVIVAL SKILLS’ you are looking for are to get a other way. How?!…

OK, imagine you are going trough a blind turn, and you are realizing that you are heading towards debris. What do you think is the appropriate procedure to get ‘around’ it (the solution is in the word)??? Yep… you need to ‘corner’ to go around it.
What about avoiding the deer or the damn Prius?… Yep… you need to ‘corner’. What about to hit the ‘escaping’ gap you see opening?… Yep… you need to ‘corner’. What about to have to emergency brake so hard, but you mental coolness allows to make decisions to ease into trail braking and to counter steer away?!… YOU NEED TO LEARN TO CORNER TO GET THE SURVIVAL SKILLS YOU ARE LOOKING FOR! Ergo- A cornering class is what you need for God’s sake!You think you can get it in a parking lot class which copied their drills from others? Is this the way you could get the MENTAL COOLNESS I’ve mentioned?! Sorry no, and please let me add at this point that your mental stability is the skill which kicks in first when hitting debris, the deer, the Prius driver, or that 20 years old driving that SV while texting a complaint on Facebook how f’d up everyone is driving today. I know I can help you with that too.
Headcoach Can Akkaya, Sacramento 03/21/2018


Superbike-Coach Releases Its 2018 Schedule

Sacramento, CA – January 2018

Superbike-Coach announced its 2018 track day and class schedule today. The popular riding school has upped the stakes to include new benefits and offers to their students and track day riders.

Superbike-Coach provides sport photography by Dean Lonskey free of charge at all classes and events.  And, the track fee is included at their Cornering School program (the training program of choice for U.S. Airforce riders).  They also offer free snacks, coffee and drinks throughout the day. The riding school offers these unique classes and renowned 1-on-1 programs for both track and street riders:

New to the Superbike-Coach program is the ‘Basic Rider 1-on-1’ training riders from scratch to get them ready for their DMV riding examination. Also new is the ‘Race Academy’, which offers affordable and efficient training for track riders and racers. The track day programs are going on their 4th year and are wildly popular. The 2018 season track event schedule is as follows:

Cornering School – Day 1 at Little 99 Raceway on 01/28/2018

Cornering School – Day 1 at Little 99 Raceway on 02/11/2018

Track Drill 1-on-1, Sonoma Raceway on 02/24/2018

Suspension Workshop & Track Time at Little 99 Raceway on 02/25/2018

Cornering School – Day 2 at Little 99 Raceway on 03/04/2018

Cornering School – Day 3 at Little 99 Raceway on 03/25/2018

Track Drill 1-on-3, Thunderhill East Raceway on 04/01/2018

Cornering School – Day 1 at Little 99 Raceway on 04/08/2018

Knee Down at Little 99 Raceway on 04/28/2018

Wheelie Course at Little 99 Raceway on 04/29/2018

Track Drill 1-on-3, Laguna Seca Raceway on 05/12/2018

Cornering School – Day 1 at Little 99 Raceway on 05/13/2018

Cornering School – Day 2 at Little 99 Raceway on 05/26/2018

Track Day, Thunderhill Raceway West on 06/10/2018

Suspension Workshop & Track Time at Little 99 Raceway on 07/15/2018

Track Drill 1-on-3, Thunderhill East Raceway on 07/28/2018

Track Drill 1-on-3, Thunderhill East Raceway on 07/29/2018

Knee Down at Little 99 Raceway on 07/29/2018

Cornering School – Day 1 at Little 99 Raceway on 08/12/2018

Cornering School – Day 2 at Little 99 Raceway on 08/26/2018

Track Day, Thunderhill Raceway West on 09/08/2018

Track Drill 1-on-3, Buttonwillow Raceway on 09/15/2018

Track Drill 1-on-3, Buttonwillow Raceway on 09/16/2018

Cornering School – Day 3 at Little 99 Raceway on 09/23/2018

Knee Down at Little 99 Raceway on 10/13/2018

Wheelie Course at Little 99 Raceway on 10/14/2018

Cornering School – Day 4 at Little 99 Raceway on 10/28/2018

Race Academy at Little 99 Raceway on 10/28/2018

Cornering School – Day 1 at Little 99 Raceway on 11/18/2018

Track Drill 1-on-3, Buttonwillow Raceway on 11/24/2018

Track Drill 1-on-3, Buttonwillow Raceway on 11/25/2018

I can tell ya… the Ducati Panigale is a beast, and truly a challenge to your balls- also in regard heat!

The 1199R is a race bike- period. People are surprised how hard to ride it actually is. The faster you go- the better it is, but the slower you go- the more this bike can be a pain in a butt. It needs time and money to solve these issues if you want to use a Pani on the street in traffic.

I gave lots of advice and suggestions in this article series, but the ‘heat management’ was secondary to me first. Now since i am riding it more often for pleasure, to teach Track Drill 1on1 on race track, or Road Skill 1on1 on public roads- the more I realized I should have prioritize this problem.

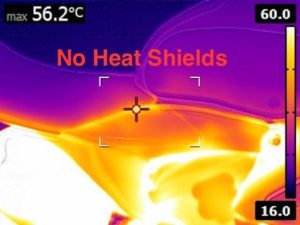
The significance is the ride-ability and performance. Cool gas is power and engine elastics- and not to get the boiled keeps riding fun up. The rider sits literally 3 inches above the rear cylinder of a 195 horsepower bike, and the heat is conserved. You’re standing in California waiting for green light, while the water temp of the monster climbs up to 220f. It’s time for improvements.

So, my goal is it to drop temperature, and to gain engine performance. Not looking for the ‘perfect’ though, because that is not existing. First, I uninstalled those ugly cylinder plastic covers. I believe they conserve the heat around the rear cylinder just a little too much and to affect its performance. Also- the conserved hot air is literally lead right between your legs and the lowest part of the gas tank. After riding it without those covers it was actually a little better- so off they go.

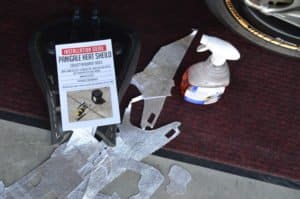
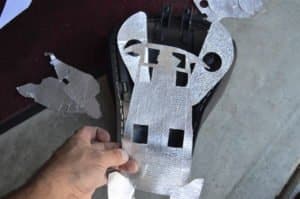
I was actually planning to get me some heat shield mattes and to cover everything on a logical bases to block or to lead hot air. The ‘good’ material which is in use by NASA, Formula 1 and MotoGP is expensive though, and I would have to puzzle it… but then I found the “Panigale Heat Shield“. The adhesive kit includes all puzzle pieces, like to cover the seat pad and the sub frame legs. Some tools, a de-greaser and about 30 minutes later the job was done, but I wanted to do more though. The part of the gas tank which is buried in the sub frame, hovers about an inch above the cylinder. Sooner as you might think, the entire aluminum body is warmed up and affects comfort and gas temperature.

A additional piece of foam behind the gas tank reduces the hot air floats under the seat, and leads to the cutouts in the sub frame legs. These modifications should also help reducing the mechanical noises a little.

So, thanks to ‘Panigale Heat Shield‘ I could save some time of work and to find the right material. Even if you don’t have a Pani… go and find the weak spots on your ride, and enjoy ‘creating’ and to improvise things. Make it YOURS :-)

Headcoach Can Akkaya, Superbike-Coach Corp

Protecting the gas tank with some kind of pads makes sense in multiple ways. Let’s just name scratch protection, resale value, or upgrading looks. For me, and that goes for decades of riding on and off race tracks- the main reason is to stay in place where I want. In fact- I am almost ‘abusing’ my gas tanks. Here is how:

  • Squeezing knees in the tank cove pads while braking (keeps weight low and in the rear AMAP)
  • Dragging ass over the seat to the other side by pressing outside knee in the tank pad

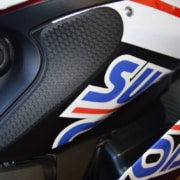
There are some products on the market, but my requirements are narrowing it down, especially since i have a healthy wear of those tank pads. I always end up with TechSpec Gripster Tank Pads for some good reasons also for my Ducati Panigale 1199R:

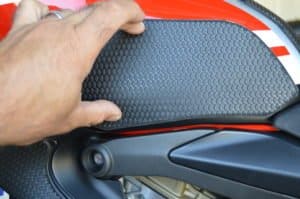
  • Easy to install (smooth material)
  • Looking real good (that’s clearly individual preference)
  • Giving the right amount of hold (other products killing your gear)
  • Reliable (protect function and price)
  • Easy to remove/replace (no stain, no paint killer)

TechSpec’s theory of achieving a solid grip is based on material properties and surface area contact. Their products are available in two materials: Snake Skin and the XLine.

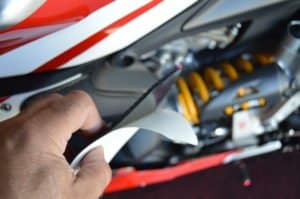
What I personally like is that I easily could customize a pad if necessary.  We have TechSpec pads mounted on all Superbike-Coach bikes. Especially on our Supermotards, the wheelie 1on1 bike and the rental bikes, because they give the hold on to the gas tank my students need once that front wheel goes up. TechSpec even makes installation videos which shows how easy it is:

So, my recommendation to you is… what’s good for me should be good for you. I think that this is one of the first upgrades a rider should do to the motorcycle. Not just before scratches even happen… also to not to miss out on that extra hold when you might need it the most… in an emergency braking maneuver.

Headcoach Can Akkaya, Superbike-Coach Corp

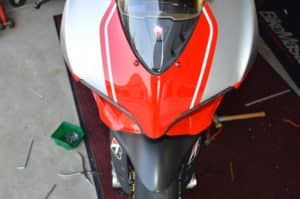
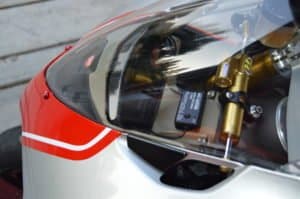
It was time to put ‘Cleopatra’ into her new War dress, but I was quite nervous about the fit. Back in Europe, I’ve installed a aftermarket fairing kit ones to a R1, and some of those mounting holes were half an inch away from its destination. That the ABS plastic seem easily crack-able added frustration. Now Cleo’s armor does not- by far- but the damn thang is heck of awesomely painted, that any additional drill would mess it up.  The preciseness of a Panigale fairing goes way beyond that point the term ‘tight fit’. The Italians put so much heart into it, so let’s see how it goes with the installation.

Straight up… it took me half a day just to mount the upper fairing. I took my sweet time to resize holes, but in the end it all fits and I didn’t crack anything. The fit is surprisingly close, but not as perfect as the holes sitting in a stock fairing. With patience and brain you’ll get it done, I promise. To be clear… I didn’t had to ‘ovalize’ those holes. Some were just too small or had to be cleared from the paint.

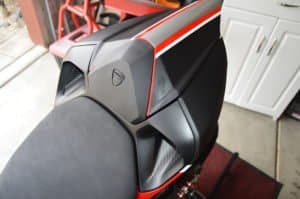
I’ve messed up the seat… yea, really! OK, there are those air flow ducts in the Panigale seat. I added some carbon pieces, but they didn’t cover the inside fairing piece at that point fully, so that there the viewer would have a direct view to lots of mixed colors. To make it look clean, I had to brush some matte black paint on the inside of those seat panels. To make that stick, I de-greased it with brake cleaner. Way to aggressive chemicals- and the paint got messed up a little. Not good! The same I had to do with the inside of the upper fairing, but good that men can learn by mistakes.

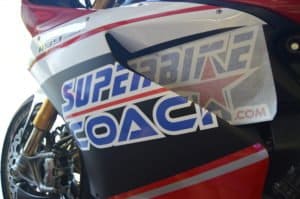
Actually it was planned to install with quick releases, but I run out of time since I have to pack up for a Track Drill coaching gig at Buttonwillow Raceway. Still no total pictures, but my plan is to put Cleopatra out on the start/finish line and shoot some for ya. So let’s get that Superbike-Coach logo on the bike and fill up the gas tank… Buttonwollow here we come :-)

Headcoach Can Akkaya

Ducati Update 5

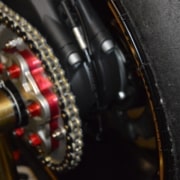
That was quite a biggy. In order to reduce rotating masses, I wanted to convert from a 525 to a 520 chain. The way lighter (50% less) sprocket carrier was standing 5mm off center so that I had to add a spacer, and to shape off those 5 on the outside plate, to give the new aluminum axle nut enough ‘meat’ on the axle shaft. The BikeMaster O-ring chain was running smooth as hell after those mods. Now… motorcycle manufacturers now how to make a sales pitch… one of them is the stupid number on the high gloss brochures, and this is ‘top speed’. Who the hell needs 202 mls per hour?! So I use to gear all my bikes for acceleration, cuz’ that’s what you do all the time- especially on the track. I use to go 1 tooth smaller on front- and 1 bigger on the rear… which is massive (fits to most tracks longest straights and is plenty on roads)! But since this Ducati has the torque to roll the Earth quicker in its axle, I decided to only drop a tooth on the front, which also keeps the weight low. BikeMaster has all kinds of sprocket constellations for your bike too! I also replaced the damn cheap looking circus wagon bolt and washer with a Titanium bolt which also allows a safety wire. That funny looking Ducati sprocket cover found a new home too… the trash bin.
Headcoach Can Akkaya